Most beginners and casual photographers take camera shots from where they happen to be standing. That’s fine if you just want a record shot.
This works if it’s a group of friends at a party or a nice view of the countryside. But there are many different angles in photography that all have an impact. And we’ll explore 10 of them.
When people think of camera shot angles, they usually think about the angle of the camera body. Is it pointing up, down, or straight ahead? Those are all determined by the “tilt” of the camera.
A low angle for a camera shot emphasizes the size of your subject. A high angle does the opposite.
If you’re a portrait or wildlife photographer, you need to get to eye level most of the time so you don’t distort the perspective. And the “Dutch” camera angle offers an interesting alternative.
But this is all only one axis. You can also “pan” the camera from side-to-side or “roll” it so that the horizon is at an angle.
Another way of looking at the camera angle is the “field of view” (or angle of view). This value, measured in degrees, shows how much of the scene your lens can fit.
For example, if you have a wide-angle lens, you can capture much more than a telephoto. Wide-angle lenses from around 12-35mm are usually best for landscapes.
Long lenses, from 200-800mm, are more suitable for close-ups and wildlife photog. And lenses of around 85mm focal lengths are in the middle and better for portraits.
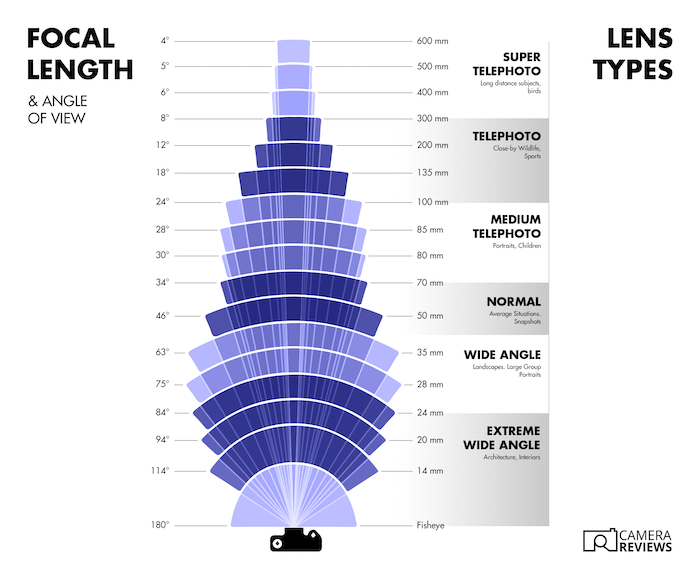
Macro lenses from 50-200mm capture images at life-size (1:1). So they’re ideal for those who want to photograph insects.
But there are always different ways of doing things in photography. For a wide shot, you don’t necessarily need a wide-angle lens. You could use a long lens and simply move further back!
The same goes for close-ups. Yes, they’re often easier with a long lens, but you can also use a wide-angle lens.
The difference is in the sense of perspective. Wide-angle lenses emphasize perspective and make distant objects seem much further away.
Long lenses do the opposite, flattening the perspective so that everything seems to be on the same plane. Which effect you choose is entirely up to you!
We’ll first look at the different camera angles we first think of. This involves the direction we point our cameras. Then we’ll delve into three field-of-view angles.
The most common (and successful) way of taking pictures of people and animals is the shoulder-level shot or eye-level camera angle.
It’s effective for basic camera shots because it connects the viewer and the subject. There’s no distortion or forced perspective.
It’s almost as if you’re looking in the mirror. And this emphasizes the similarities between the viewer and the subject.
In the case of wildlife photography, taking camera shots at eye level rather than from a high angle is crucial in “letting in” the viewer.
It’s as if you enter the animal’s world because you see it from the same height—as if you were a member of the same species!
People talk about “point-of-view” (POV) shots in videography or filmmaking. These are like eye-level shots but with one crucial difference. It’s the eye of the photographer, not the subject!
The filmmaker is trying to show exactly what the observer or participant sees. As a result, the camera might be at any level.
If the videographer kneels or lies down, it’ll probably be a low-angle shot. If the videographer stands up or climbs a flight of stairs, it’ll be a high-angle shot.
That makes a big difference to the way we see the subject. If the videographer is filming people using a POV approach, you won’t necessarily see subjects at eye level.
They might be sitting, lying down, or even jumping around—who knows?
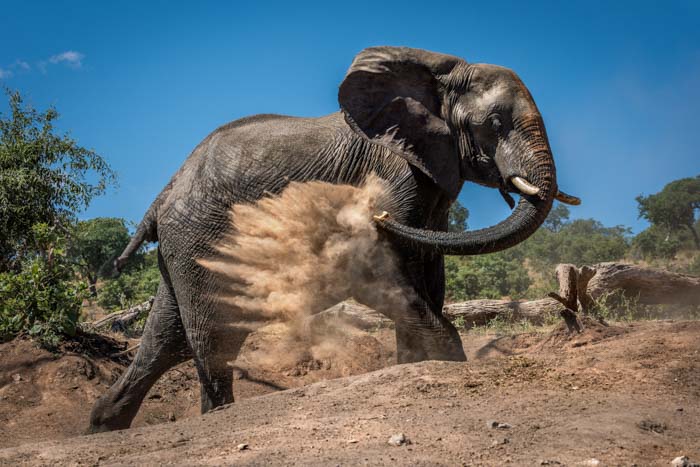
Taking shots from a low angle means pointing the camera up toward your subject. That inevitably makes it seem bigger (and the photographer smaller).
It’s an unusual perspective, and it can work in portrait photography if you want to emphasize the power of a politician or athlete.
But it’s not so good in general portraiture as the viewer might end up looking up the subject’s nose!
In wildlife photography, the low-angle shot is a great way to stress the power and size of large animals such as elephants, rhinos, or hippos.
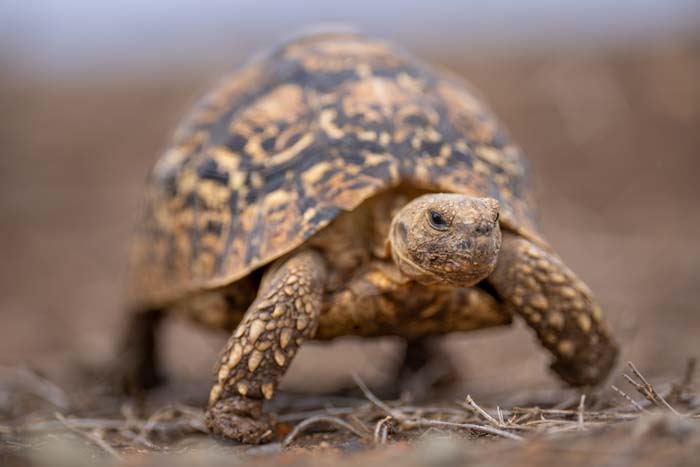
But you can also turn the tables and create a false perspective by taking low-angle shots of small animals, such as mice or crabs.
In fact, if you use a wide-angle lens for a close-up, you can create a “visual joke” by giving the impression that your subject is much bigger than it is!
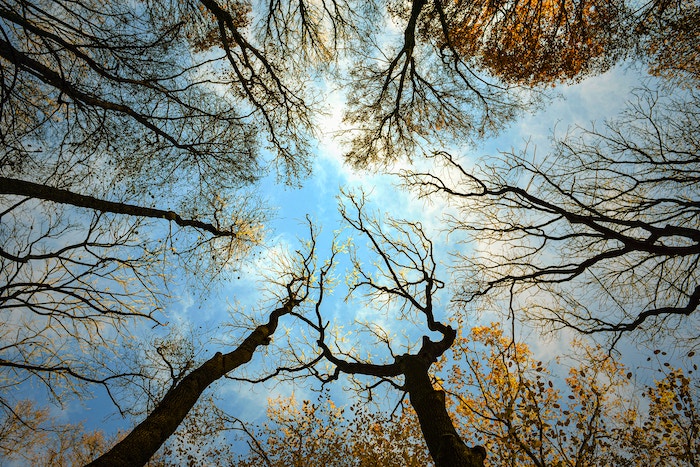
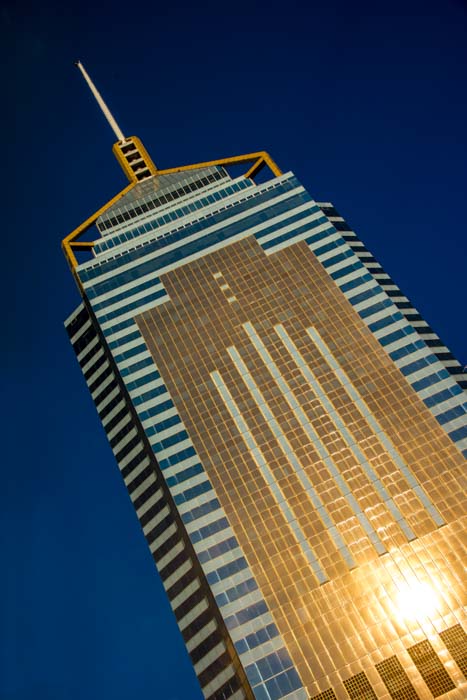
The most extreme form of the low-angle shot is the bug’s-eye view or worm’s-eye view. This means shooting vertically upwards.
You don’t necessarily need to lie down on your back to do it, but it might exaggerate the effect. Typical subjects for shots of this type are skyscrapers and tall trees.
If your subjects are close enough together, it can look like they’re crowding in from all sides of the frame. And they leave only a tiny patch of sky in the middle.
You can also use the technique to photograph kids on a climbing frame. Or you can use it for pictures of circus performers, such as trapeze artists and high-wire acts.
The high-angle shot is the opposite of the low-angle one. Again, it means taking shots from a different perspective, but this time it emphasizes the smallness of your subject.
In some settings, it’s easy to take high-angle shots by simply standing up or climbing a ladder or a flight of stairs.
But getting a high-angle shot in flat environments like the desert or the African bush is harder. You might need to be a bit more inventive and use a selfie stick or even a drone!
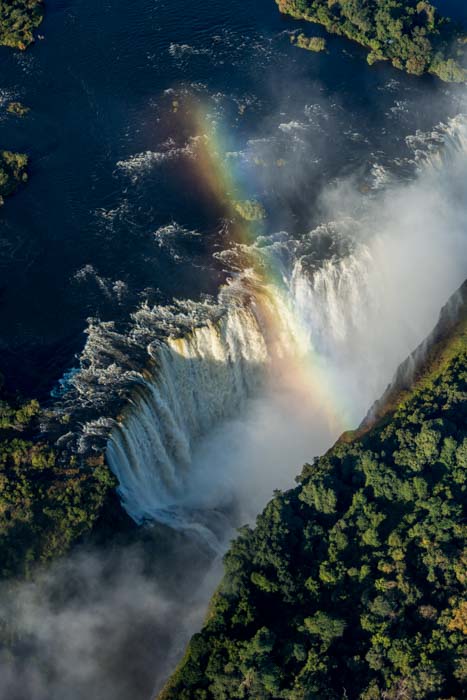
The ultimate high-angle shot is the bird’s-eye view or aerial shot. You take this looking straight down toward the ground.
It’s common in food photography. It offers an unusual angle and can make the pattern of dishes and utensils on a table look like an attractive, flat-lay still life.
In other genres, it can be hard to execute—unless you’re looking over the edge of a tall building or the bow of a ship!
A drone can help with the bird’s-eye view or aerial shot. But there are rules against using drones in national parks.
It’s worth checking about this in advance. Generally, you’ll need to be on private land to be able to get away with using drone cameras.
Taking shots from a Dutch angle means rolling the camera horizontally to a canted angle so the horizon tilts a few degrees.
The word “Dutch” in Dutch angle is a corruption of Deutsch (meaning German). This is because the makers of silent films in Germany popularized the technique in the early 20th Century.
The key to the Dutch angle is to make it obvious. If you only roll the camera by a few degrees, it looks like you’ve made a mistake!
It’s best to use a 30-45 degree angle. This convinces people it wasn’t accidental and that you meant to do it.
Another thing to avoid with Dutch angle shots is placing straight lines from one diagonal corner of your frame to another. It looks odd, so try to “miss” the corners by a few degrees.
Panning the camera means moving it from side to side (or up and down) to make it easier to photograph a moving subject. It might be a car, a person, or even an animal.
It works particularly well when you use a slow shutter speed. That’s known as a slow pan.
The idea is to show the energy or movement of your subject. You do this by blurring the legs or wheels and the background while keeping the head or other main features sharp.
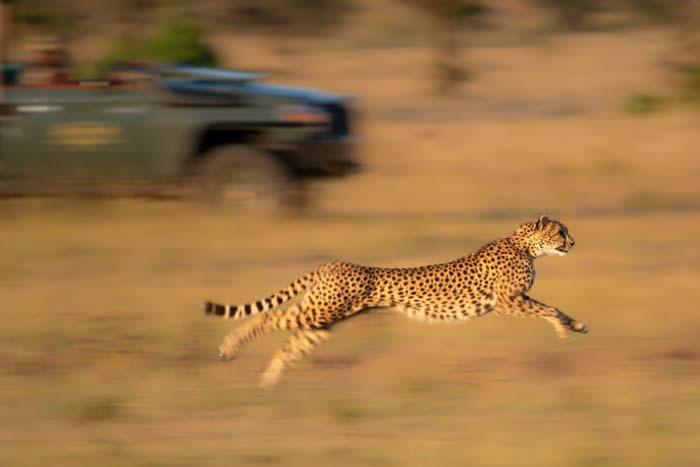
The effect can be memorable. But it’s a tricky skill to master. So your hit rate might start quite low!
Panning usually means moving the camera horizontally, but you can always try a vertical pan. That might work for someone doing a bungee jump or a leopard leaping down from a tree.
For videographers, each term has a specific meaning. A “pan” means following the subject horizontally from a fixed point. And a “tilt” means doing it vertically.
Meanwhile, a “tracking shot” goes wherever the subject happens to go, either horizontally or vertically.
The field of view (FOV), angle of view, or lens view is the amount of the scene that can be captured in a photo. Most people use the term to refer to the horizontal angle from left to right.
Manufacturers show this horizontal view in their marketing materials. But it can be used in the vertical sense, too, from top to bottom.
As we showed, the field of view changes according to your focal length. A wide-angle shot will thus have a wider field of view than one taken with a telephoto lens.
For example, a 35mm lens on a full-frame camera provides a 54.4-degree horizontal FOV and a 37.8-degree vertical FOV.
By contrast, a 400mm lens provides a 5.2-degree horizontal FOV and a 3.4-degree vertical FOV. That’s quite a difference! So let’s look at three typical camera angles.
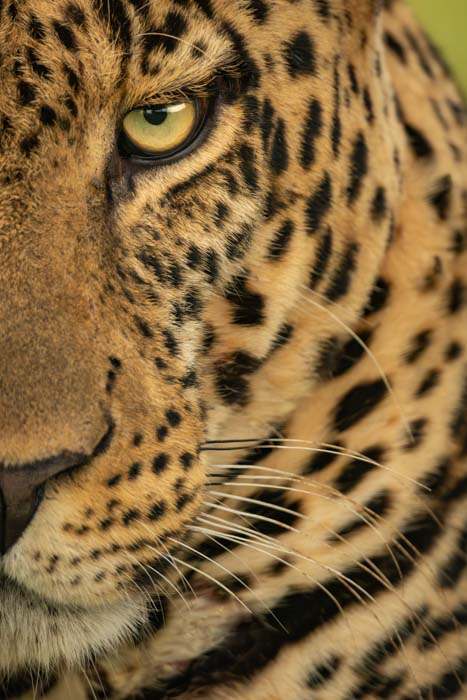
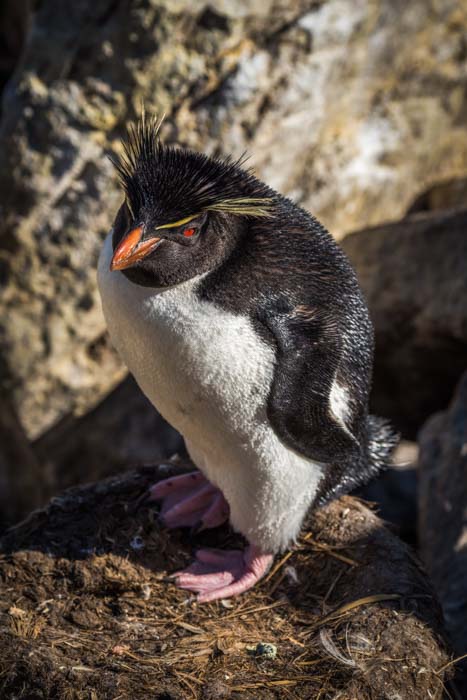
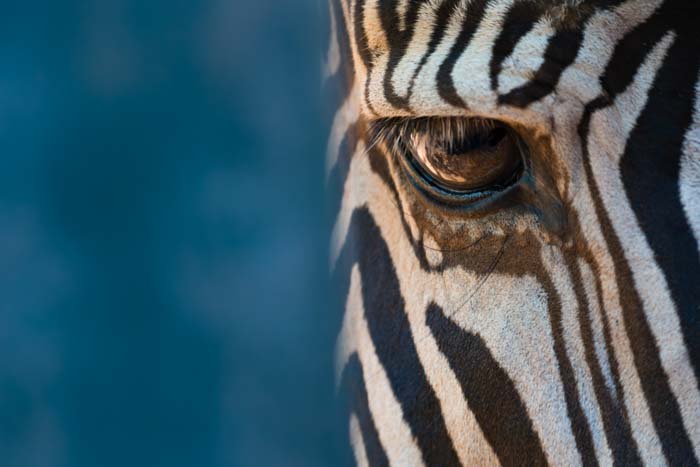
Close-ups are a good way of showing details you wouldn’t normally see. The human eye, for example, can be full of beautiful, colored patterns. And you can only show it in a close-up shot.
There’s no strict definition of a close-up. But I label any of my photos a close-up if it doesn’t show the whole of my subject.
I’m a wildlife photographer. So this might mean a lion’s face or a leopard’s tail!
If your subject completely fills the frame, you might call it an extreme close-up. Again, this isn’t an official definition. It simply describes an exaggerated version of the same shot.
It’s easier to take close-ups with longer lenses. It’s usually too hard to get close enough to your subject to be able to use a wide-angle lens—and there’d be too much forced perspective anyway.
The other advantage of long lenses for portrait photography is that they flatten perspective. This produces a more flattering look. The “ideal” portrait lens is supposed to be around 85mm.
But it depends on how much of your model you want to show. A longer lens can let you work at a more comfortable distance if you’re taking a lot of close-ups.
For wildlife, animals can be very skittish, and the birds can be tiny. So it’s hard to get close. This means you need a lens longer than 400mm. And ideally, a 600mm or even 800mm lens.
If you can’t get close enough or don’t have a long enough lens, you can always crop in later. But this comes at the expense of losing pixels, which reduces image quality.
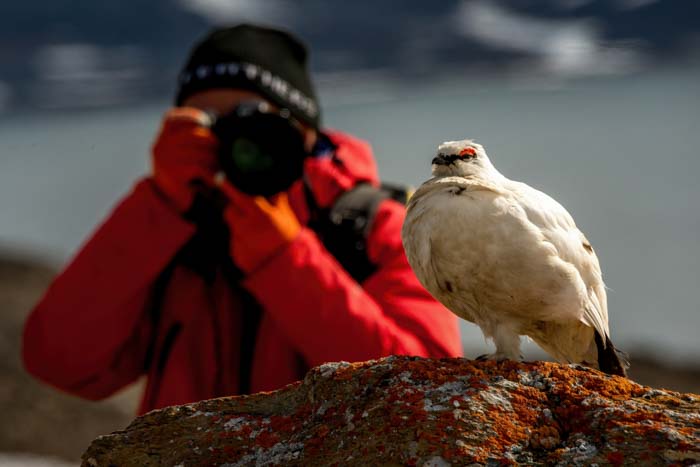
If you want to show a bit more of the environment (and perhaps your subject), you can always switch to a medium shot. You can show the head and torso if you’re taking a portrait.
Plus, you let viewers see some of the surroundings, such as a garden or a restaurant. The same goes for wildlife shots. But the background is likely to be a bit different!
It seems fashionable these days to take “environmental portraits.” It’s especially clear in wildlife photography.
People are increasingly trying to show animals and birds in their surroundings. This means taking a long shot or wide shot to include both the subject and the landscape.
There’s no strict definition, but the subject might take up 10 to 25% of the frame. This allows you to show the relationship between the creature and its environment.
You can do the same, of course, as a portrait photographer. All you need to do is find an interesting location that will add to the composition.
For a long shot, you generally need a mid-range prime or zoom with a focal length of around 100-300mm. But it depends on your subject and where you are in the world!
If you want to differentiate your photos, choosing the right camera angles can be a good technique to master.
Portraits of people or animals normally look best when taken from eye level. But different angles in photography alter the perspective of the viewer.
This means the subject appears larger with a low-angle shot or smaller with a high-angle shot. You can even create a wacky look with a Dutch tilt!
The field of view is also important. It differentiates between a close-up, a medium shot, and a long shot.
Some subjects benefit from the close-up treatment, while others need a broader canvas. Try a combination of close-ups, medium shots, and wide shots to capture all aspects of your subject!
Check out our posts on fog photography or sunset photography settings next!