Here are 16 different camera settings for beginners. Mastering them all can be a bit tricky. However, this is one of the things I liked about learning photography. I enjoyed reading the odd guide to camera settings (like this one) and putting it all into practice.
It’s easy to take the lazy option and leave all your camera settings on Auto. However, that doesn’t always work. By making an effort to understand what you need to do and what’s likely to go wrong, you’ll be able to take better pictures. And that’s half the point, isn’t it?
Quick Start Guide: Camera Settings for Beginners
This guide to camera settings will tell you everything you need to know about the basics of photography. I’ve divided it into three main sections—exposure, focus, and other.
So let’s get started with a quick state guide to camera settings. I recommended settings for you to begin with. The rest of the article discusses each in more detail, and you can use the jump links (click on the blue camera setting name!) to go straight to each section:
A. Exposure Settings
- Aperture: Wide open (smallest f-number like f/2.8) for portraits, wildlife, and sport. Smaller apertures (larger f-numbers) f/11 or f/16 for landscape photography
- Shutter Speed: 1/250 s for portraits, 1/1000 s for wildlife and sports photography
- ISO: Auto ISO
- Exposure Mode: Manual (with three custom camera settings for your favorite types of shots)
- Exposure Compensation: Zero (unless needed)
- Metering Mode: Matrix (or Evaluative on Canon cameras)
B. Focus Settings
- Focus Mode: AF-C (continuous autofocus mode)
- Focus Point or Area: 3D tracking for DSLRs, Zone for mirrorless
- Eye or Subject Detection: On (Human, Animal, or Bird as appropriate)
- Back Button Focus (BBF): On
C. Other Camera Settings
- File Format: RAW
- Shooting Mode: Continuous High (Nikon), H (Canon), or H+ (Sony)
- Image Stabilization: On (or 1 for “normal”)
- White Balance: Auto
- Electronic Level: On
- Metadata: Completed
A. Exposure Settings
Any guide to camera settings should start with exposure. Getting this right is one of the most important jobs a camera has to do. Cameras don’t know what they’re pointing at, so manufacturers must tell them what to expect. Every picture’s different, so they have to make an assumption, which is that the scene reflects 18% of the light that falls on it.
Bearing this in mind, the camera’s built-in exposure meter tells you whether the picture you’re about to take is correctly exposed. Or if it shows if it’s too dark or too bright.
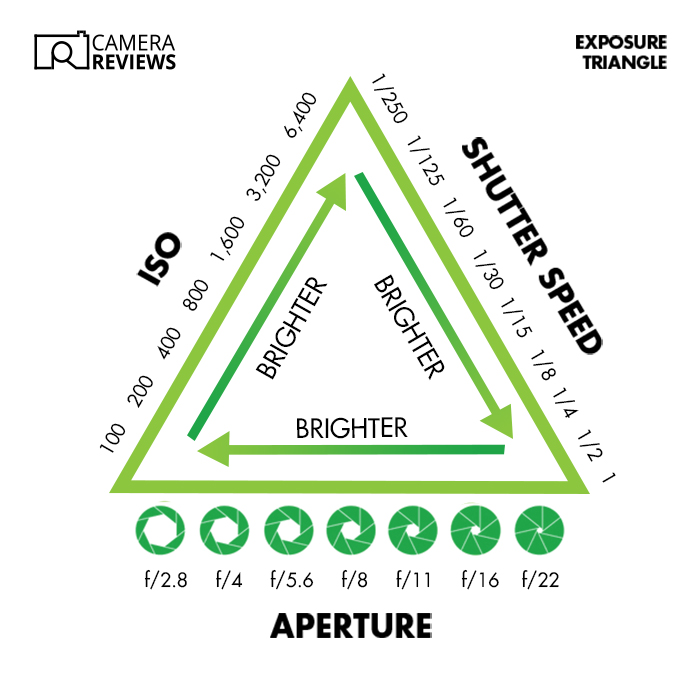
If you want to change the exposure, there are three camera settings you can use that make up the “exposure triangle”:
- Aperture
- Shutter speed (or time value on Canon cameras)
- ISO (or film speed)
You can have the camera change one or two or all the settings for you (see 4. Exposure Modes). Or you can switch to Manual mode for full control of everything. The aperture and shutter speed control brightness by changing the amount of light falling on the sensor (or film). The ISO does the same by changing its light sensitivity.
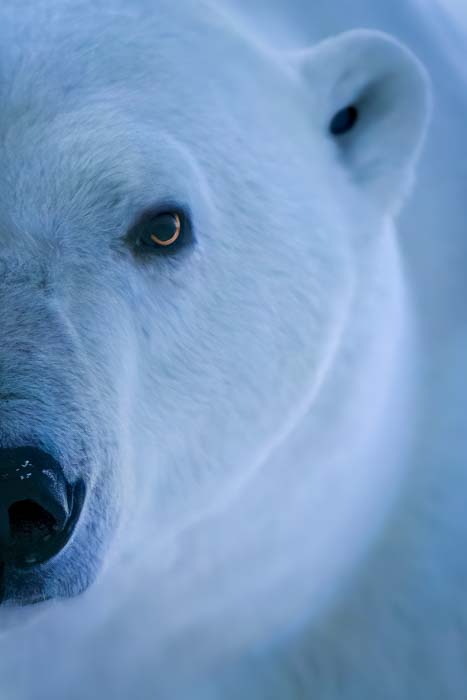
Exposure compensation stops the camera from being “fooled” into overexposing or underexposing. Photographers use “stops” of light (or Exposure Values) when discussing exposure. A stop is simply a doubling or halving of the light. So if you were photographing a polar bear on ice, you might add two stops of exposure compensation.
1. Aperture
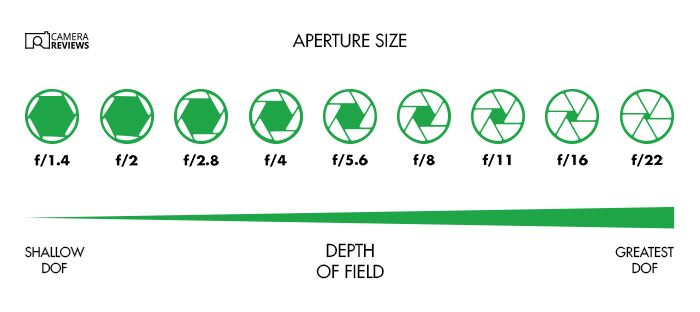
The aperture is simply the hole in the lens through which light passes. The larger the hole, the more light gets in. All other things being equal, a wider aperture brightens the image and reduces the depth of field.
This is simply the amount of the scene from front to back that is “acceptably sharp.” The higher the f-number, the higher the depth of field (DOF). Roughly a third of that distance is in front of the subject and two-thirds behind it.
What aperture you need depends on the kind of photography. If you’re taking a portrait, you probably need to shoot “wide open.” This means separating your subject from the blurred background with the widest possible aperture, such as f/2.8.
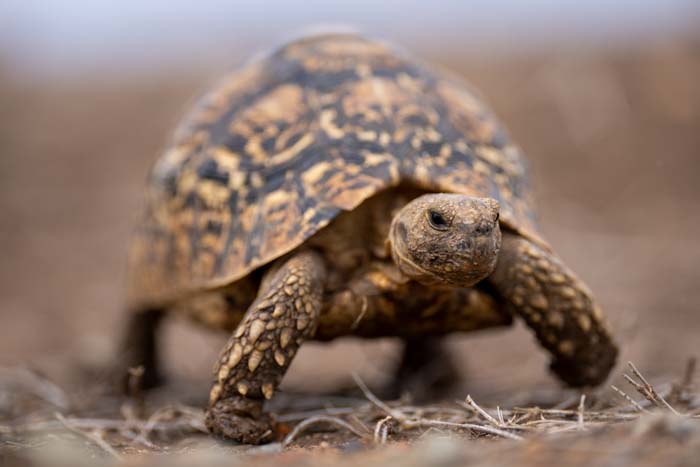
If you’re shooting landscape photography, you probably need a narrow aperture. This is something like f/11 or f/16 to keep as much as possible in focus from the foreground all the way to the background.
The aperture value is the number you get by dividing the focal length by the width of the “effective aperture” or the “entrance pupil.” This is not the aperture itself but the image of the aperture you see through the front of the lens. (I know, it’s complicated!)
The way the aperture value is calculated means the numbers don’t seem to make sense. First of all, a smaller f-number means a larger hole! That takes a bit of getting used to.
In addition, the gaps between the numbers aren’t all the same (as they are with shutter speed and ISO). For instance, if your aperture is f/4, you might think you could double the size (and the brightness) by switching to f/8. However, that would add two stops rather than one!
Unfortunately, there’s no easy way around this, but you can use the “clicks” on the aperture dial to guide you. They’re each worth one-third of a stop (although you can change that). So three clicks double or halve the amount of light getting in.
Most lenses on the market have maximum and minimum apertures somewhere between f/2 and f/32. So it’s worth knowing the following sequence (at one-stop intervals)—f/2.0, f/2.8, f/4.0, f/5.6, f/8, f/11, f/16, f/22, and f/32.
2. Shutter Speed
Shutter speed is also known as “time value” (Canon). It is simply the period of time the shutter is open, exposing the sensor (or film) to the light. The longer the period, the more light gets in, and the brighter the image. Conveniently, the numbers are nice and easy.
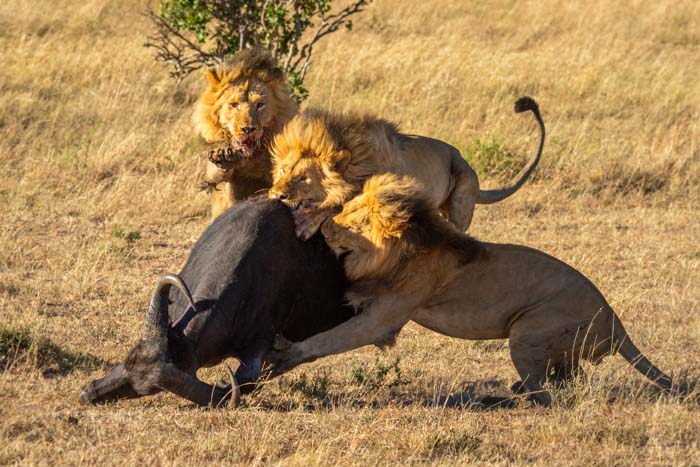
Doubling your shutter speed means halving the amount of light (or reducing the exposure by one stop). A fast shutter speed freezes the action, but exactly how fast depends on your subject. If it’s a person sitting and posing, you might only need 1/250 s. But if it’s a wild animal, you might need 1/1000 s.
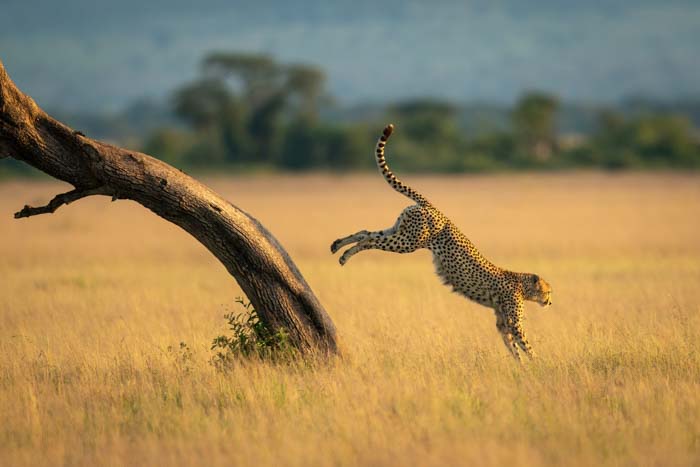
As well as exposure, the shutter speed controls the amount of motion blur in an image. Motion blur can come either from camera shake or from the movement of your subject. The faster the shutter speed, the less motion blur you get.
In the old days, the rule of thumb was that you shouldn’t use a shutter speed less than the inverse of your focal length. In other words, you shouldn’t shoot at less than 1/500 s with a 500mm lens, say.
However, modern cameras and lenses now offer up to eight stops of image stabilization, so it doesn’t matter as much.
It’s worth pointing out that blur is not necessarily a bad thing. Yes, if you want a simple family snap, you won’t like your four-year-old’s face smeared all over the frame!
However, if you want to be a bit more artistic, there are ways of using a slow shutter speed to suggest movement and energy. One way is slowly panning your camera.
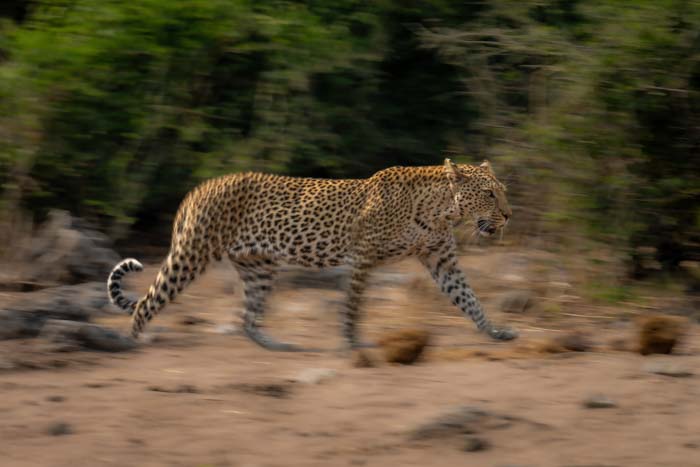
You can also get beautifully creamy effects when shooting waterfalls with a slow shutter speed. But you must use a tripod for the best results.
Note that, strictly speaking, the shutter speed is a measurement of time rather than speed, and Canon calls it Time Value. However, almost everybody else calls it shutter speed, so that’s probably your best option unless you have a Canon camera!
3. ISO
The third element of the exposure triangle is ISO. This is the standard unit of light sensitivity for both digital sensors and film. As with shutter speed, the numbers are very convenient. If you double the ISO, you also double the sensitivity. That means a photo taken at 500 ISO is twice as bright as one taken at 250 ISO (all other things being equal).
You can choose your ISO manually, but there’s not much benefit because it doesn’t affect the artistic quality of the image. The best solution in most circumstances is Auto ISO.
Most cameras offer this, meaning you don’t need to worry about the overall exposure. If you need to fiddle with it, you can always use exposure compensation (see 5. below).
Changing your ISO doesn’t have any “artistic” impact, but avoiding high ISOs is a good idea because they introduce “noise.” This is the equivalent of “grain” in film cameras and refers to blotchiness and lack of contrast or color saturation.
Some cameras even give you the option of limiting the max ISO, but you have to be a bit careful. You’d rather have a noisy picture than no picture at all!
4. Exposure Mode
To control aperture, shutter speed, and ISO, you can choose different exposure modes, from Manual mode to Auto mode. Here are the main ones you usually see on the mode dial (or camera dial or PASM dial):
- Program (P)
- Aperture Priority mode (A or Av)
- Shutter Priority mode (S or Tv)
- Manual mode (M)
- Auto mode (Auto)
- Custom modes (like 1, 2, and 3 on the Sony a1)
- Scene mode (various)
- Video mode
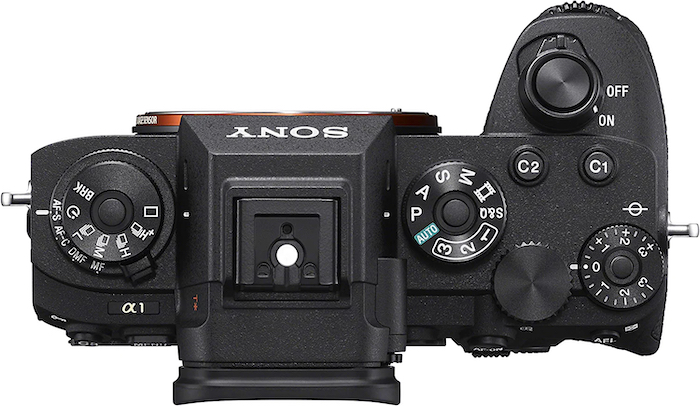
Which mode you choose depends on how much responsibility you want to take for the exposure of your photos! The most convenient one is Auto mode, which does a pretty good job most of the time.
Most compact cameras also provide different scene modes to help you get the right shutter speed, aperture, and ISO settings. For example, Landscape might give you a relatively low shutter speed but a narrow aperture for maximum depth of field.
It varies with each camera, and they may use icons instead. But here are a few of the most common ones:
- Portrait mode
- Night mode
- Macro mode
- Beach mode
- Snow mode
- Sports or Action mode
- Panoramic mode
If you want more control over the individual camera settings, you can use Program (or Intelligent Auto mode). However, you still only get limited flexibility. You can switch to Shutter Priority mode to ensure you get the right shutter speed.
Equally, if you’re more worried about the aperture, you can use the Aperture Priority mode. It all depends on your chosen subject and genre.
Most professionals shoot in Manual mode, but that’s not as scary as it sounds if you use Auto ISO. That way, you never have to worry about the exposure, but you still control the shutter speed and aperture.
Those are the camera settings that matter. Once you’re happy with those, you can concentrate on the composition and timing of the shot.
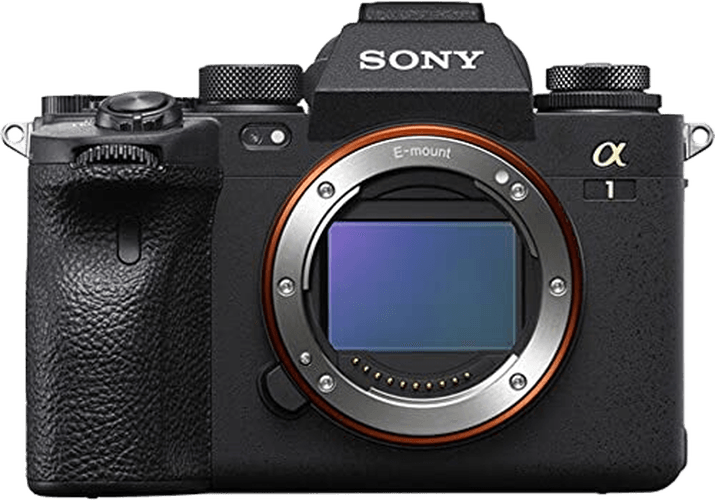
Sony a1
Finally, the custom modes available on the Sony a1 and other mirrorless models are incredibly useful. This is because they allow you to save a wide range of camera settings. That means you can easily switch to a completely different type of shot by simply turning the mode dial.
My three custom modes are set to portrait, action, and slow pan, giving me a huge speed advantage. In the old days, when I had two DSLR camera bodies, I used to have to devote one to portraits and one to slow pan shots.
That’s because I knew I couldn’t change all the camera settings quickly enough if the opportunity arose! Nowadays, I can be ready in an instant.
5. Exposure Compensation
If you let the camera have responsibility for setting the exposure, there’ll always be times when it screws up. This is because you always know what you’re shooting, but the camera doesn’t.
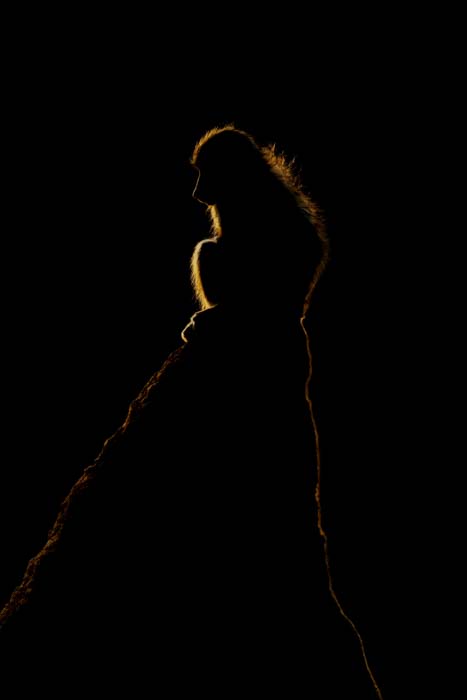
That means you’re a better judge of the best exposure. In most circumstances, it probably won’t matter. But what are you supposed to do if you’re photographing a polar bear in the Arctic or a black bear in the forest?
Fortunately, that’s where exposure compensation comes in. Most cameras have a dial that lets you compensate for the mistakes of your camera when the world isn’t 18% grey.
To make the scene brighter, all you need to do is use positive exposure compensation. For instance, when the camera might make bright white snow seem dull and grey.
In the opposite case, negative exposure compensation darkens a scene when the camera wrongly tries to brighten it up. An example would be a black bear in a forest.
Usually, you won’t need more than one or two stops in either direction, but you’ll have to experiment to find the best value. Fortunately, most people have digital cameras, so mistakes are free!
6. Metering Mode
Another way of helping your camera get the best exposure is to play around with the metering mode. This is the area of the frame used by the exposure meter to work out the “correct value.” There are three basic options:
- Spot Metering: This uses a tiny section of the camera sensor (usually around 3 to 7%). It calculates the exposure to prevent the camera from being “fooled” by a bright or dark background. The idea is that you can increase the exposure accuracy by metering off the subject. However, if your subject is either darker or lighter than the standard 18% tone, you still need to use exposure compensation. Otherwise, you can meter off a more suitable area, such as a patch of grass or a person’s skin.
- Center-weighted: This tries to make metering more accurate by ignoring the corners of the frame. This rests on the assumption that your subject is likely to be fairly central, which is usually fair.
- Matrix (or Evaluative on Canon cameras): This is again an attempt to provide the best of both worlds. It’s based on a proprietary algorithm that uses all the information available to the camera to choose the best exposure. This is easily the best system, so it should be your default except in special circumstances.
B. Focus Setting
This section the basic camera settings involving focus you need to worry about. After exposure, the camera’s next job is to ensure the images are sharp in all the right places. Note that this doesn’t mean everything in the frame needs to be sharp.
Yes, you might want that if you’re taking a landscape shot, but generally, the viewer will think of a picture as “sharp” if the subject is sharp. That’s all that matters. In wildlife or portrait photography, that means the eyes.
Modern cameras have exceptionally powerful autofocus systems. This is especially true about high-end mirrorless models such as the Sony a1 or the Nikon Z9. They’re also fairly easy to use, but you must set them up correctly.
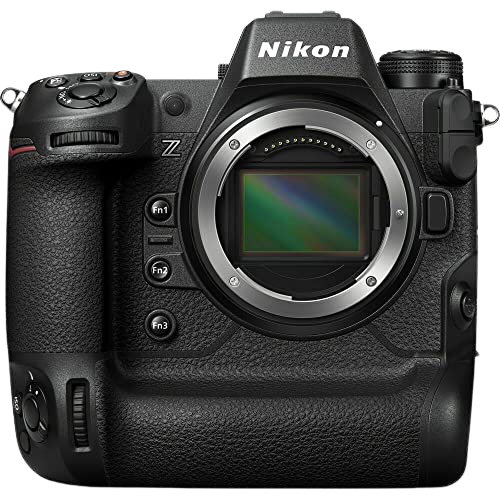
Nikon Z9
7. Focus Mode
Focus mode decides whether the camera focuses continuously, just once, or manually. There are four main possibilities, including three autofocus (AF) modes:
- AF-S (Single Shot or One-Shot on Canon Cameras): This is meant for portraits of static subjects. You shouldn’t use it for action shots. If you’re using back button focus, you half-press the shutter (or the AF-ON button). And the autofocus system is activated once just before you take the picture. It was designed in the days of DSLR cameras. They only have a small area of focus points in the middle of the frame, so you have to “focus and recompose” if your subject is outside that area.
- AF-C (Continuous or AI Servo on Canon Cameras): AF-C continuously refreshes the focus on your subject. This happens for as long as you half-pressing the shutter button (or press the AF-ON button). This is ideal for action photography but works just as well for portraits. After all, even supposedly “static” subjects sometimes blink or turn their heads!

- AF-A (Automatic or AI Focus AF on Canon Cameras): AF-A is an attempt by some camera manufacturers to provide photographers with the best of both worlds. The camera will automatically detect whether the subject is moving and switch between AF-S and AF-C when necessary. Unfortunately, it doesn’t work very well (yet!), so you’re better off sticking with AF-C.
- M (Manual focus): This switches off the autofocus system completely. AF systems are so advanced these days that you shouldn’t have to use manual focus except in extreme circumstances. Those include “difficult” situations such as looking through leaves or grass or macro photography.
8. Focus Point or Area
DSLR cameras tend to have focus points, while mirrorless ones have focus areas. However, they do the same job—to tell the camera where to look for your subject. Which one you should choose depends on the size of your subject, the range of motion, and how “clean” the foreground and background are.
Here are the main DSLR options:
- Single-point AF: This is best for accuracy. But it’s easier with static subjects.
- Dynamic-area AF (Expansion or Zone AF on Canon Cameras): This lets you choose several focus points (2, 21, or 51 on Nikon’s DSLRs) that work together.
- 3D Tracking: This is best for moving subjects and automatically chooses the best available focus point.
And here are the mirrorless equivalents (from my Sony a1):
- Wide: This includes the entire frame. It works best with “clean” backgrounds, such as a clear blue sky. It may have trouble if there are leaves or branches in the way.
- Zone: This includes around a tenth of the entire frame. It’s halfway between Wide and Spot, that’s probably the best option for wildlife photographers like me.
- Center Fix: This only uses the central focus point.
- Spot: This covers relatively small areas of the frame (Small, Medium, or Large) to avoid distractions.
- Expand Spot: This is the same as Spot but uses the adjacent focus points to “help out” when the main ones struggle to get focus.
All these areas on the Sony a1 have a tracking version that automatically follows moving subjects around the frame. However, you can also activate tracking by customizing the AF-ON button, which is how I’ve set mine up.
9. Eye or Subject Detection
Eye detection is the most valuable advance in AF technology provided by the latest, high-end mirrorless cameras. The Sony a1 forces you to choose between Human, Animal, and Bird, but the new a7R V can do that for you and detect and track vehicles and insects!
Based on machine learning, it can also recognize people by their “poses.” That’s a huge help when taking pictures of people who might briefly turn their backs or get partially hidden in a crowd.

10. Back Button Focus
This is just a way to separate focusing from taking pictures. Usually, you have to half-press the shutter button to start focusing and then press it all the way down to take a shot.
However, you sometimes need to “focus and recompose.” This is especially true with a DSLR if your focus point won’t reach the corner of the frame.
In that case, you need to use a central point, half-press the shutter, then move the camera slightly to get the composition you want and take your picture. The problem is that when you press the shutter button, you automatically start focusing again. Only this time, you won’t be focusing on the right subject!
The solution is to stop the shutter button from focusing. Instead, you press the AF-ON button on the back of the camera with your thumb (back button focus).
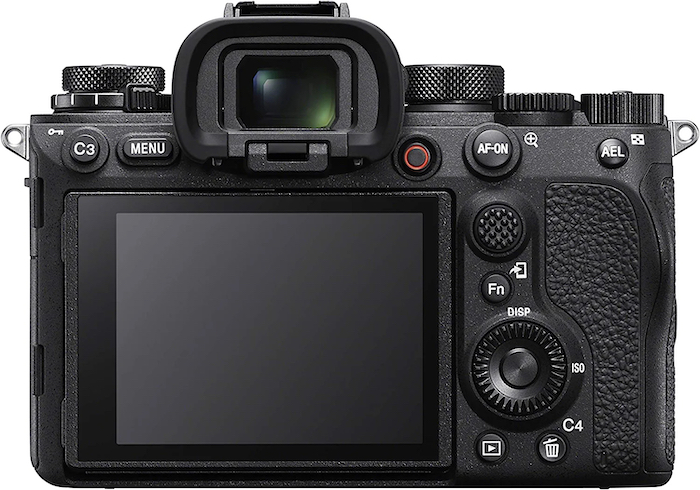
If you do that, you can focus and recompose to your heart’s content. This is less important with mirrorless cameras as the focus area is usually the whole frame, but it’s still useful.
And there’s another problem with half-pressing the shutter button. Many cameras can’t maintain focus when shooting a burst in continuous shooting (AF-C) mode. The first shot might be sharp, but if the subject moves, the others will be blurred.
Again, the answer is back button focus. If you keep your thumb pressed on the AF-ON button, the camera continues focusing on your subject no matter many shots you take.
C. Other Camera Settings
Apart from exposure and autofocus, a few basic camera settings should always be set up correctly.
11. File Format
The basic choice is between Image quality and convenience (RAW vs JPEG). RAW files saved in the manufacturer’s proprietary format contain all the info recorded during the exposure. This includes the image and all the metadata, such as date, time, shutter speed, and aperture.
That means it’s easier to recover detail in shadows and highlights or change the white balance, but they tend to be very large! That means you need more storage, which might affect the max frame rate.
JPEG files are compressed versions of the images. They are smaller and thus quicker to write to the memory card, download to your computer, or share online. However, the compression means image data is lost, which means they offer less editing flexibility.

SanDisk 128GB Extreme PRO CFexpress Card Type B
These days, memory cards are much cheaper and more powerful than they used to be, so it’s worth shooting in RAW. Yes, it does mean that you have to export any image before sharing it, but the payoff is that you get much better image quality.
These days, you may also get different size options, both for RAW and JPEG files. I recommend sticking with the max resolution for both. But there’s often a trade-off between file size and frame rate.
For example, the Sony a1 can only reach its highest continuous shooting speed of 30 fps using “lossy compressed RAW.” However, there’s not much difference in the image quality. So you’re better off choosing the higher frame rate rather than the uncompressed RAW format.
12. Shooting Mode
There are several basic shooting modes (also known as drive modes):
- Single
- Continuous or Burst (Low and High on Nikon DSLRs; L, M, H, and H+ on the Sony a1)
- Quiet (to reduce shutter noise on Nikon DSLRs) or Silent Shooting
- Mirror Up (to reduce vibration on Nikon DSLRs)
- Self-timer
These are self-explanatory, but the continuous or burst mode is the most useful. Taking only one shot at a time is risky as you might miss the crucial action. Continuous lets you take a burst of shots, which means you’re less likely to miss a shot if your subject blinks!
The continuous shooting speed or frame rate is measured in frames per second (fps), and you should probably set it to the highest possible value. This varies from camera to camera, but the Sony a1 can take up to 30 fps in compressed RAW format.
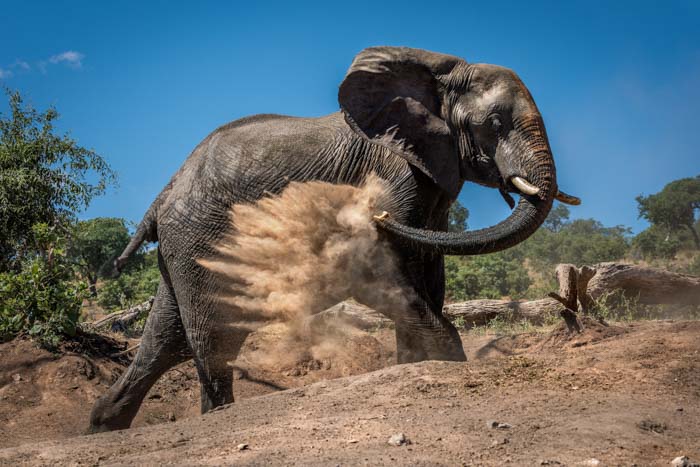
A high frame rate isn’t as important for portraits, but it’s vital for wildlife, sports, and action photography. Here, your subject may be moving very fast and unpredictably, so you must buy as many lottery tickets as you can!
If you think about it, shooting at 4 fps rather than 30 fps means missing out on 26 pictures every second! This is important because subjects can move a long way in a fraction of a second.
The frame rate is also affected by the depth of the buffer. This is the number of shots your camera can take at a given frame rate before slowing down or even stopping.
You can’t change it, so it’s not a setting. But you can improve it by using the fastest memory cards you can afford, such as XQD or CFexpress Type A or Type B.
13. Image Stabilization
A switch on the left-hand side of most lenses turns on image stabilization or Vibration Reduction (VR) on Nikon cameras. Some mirrorless cameras also offer in-body image stabilization (IBIS). This either works in combination with the lens stabilization or instead of it.
Image stabilization reduces camera shake and lets you shoot at a much lower shutter speed—assuming your subject is not moving too fast. Modern mirrorless cameras give you up to eight stops of stabilization. An example would be that you can use a shutter speed of 1/25 s rather than 1/6400 s. S, so it’s a big deal!
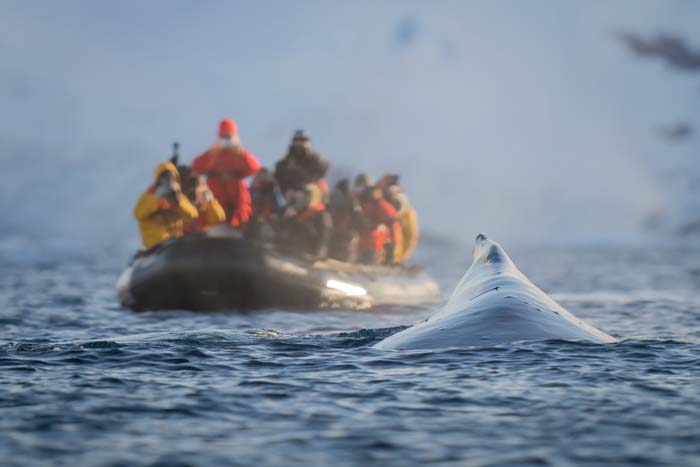
The system varies by manufacturer and lens. Some lenses have an On-Off switch, but others have two or three different modes. The first is for “normal” usage. And the second is for “active” shots, such as when you’re on a boat or a moving vehicle.
If there’s a third option (in the middle), it’s for panning shots when you want smooth horizontal motion but no movement up and down. You should probably start with one (or Normal), but you can switch to the others whenever you need to.
14. White Balance
This is just a setting to tell your camera the light conditions. It then adjusts all the colors of the image to ensure they’re not too “warm” (red) or too “cold” (blue). There are various standard settings, including the following:
- Auto
- Daylight
- Cloudy
- Shade
- Fluorescent
- Incandescent
- Flash
These days, cameras are pretty good at guessing the lighting. And you can always change it using post-processing software such as Adobe Lightroom or Photoshop (if you shoot in RAW). So you might as well stick with Auto.
However, if you’re fussy about these things, it’s a good idea to change the white balance whenever the light conditions change. That gives you the best setting. And you won’t have to go through thousands of pictures afterward, trying to remember what the weather was like when you took them all!

Adobe Lightroom
15. Electronic Level
This is a handy way of ensuring your horizon is always level. If you switch it on in your camera’s menu, you see something in the viewfinder that looks a bit like the crosshairs of a telescopic sight.
Systems vary, but you’ll generally see green lines at the top and bottom when the camera is level horizontally. And there are lines on either side when it’s pointing straight ahead (rather than up or down).
16. Metadata
Metadata is the information saved along with the image file. It can include many different camera settings, but you only need to select a few in advance. This includes basic information. The date, time, timezone, file naming conventions, and copyright information are included.
For most of this, you can “set it and forget it.” However, you should sometimes update a few details. Change the copyright information every calendar year and the time zone whenever you leave your current region.
Many photographers don’t bother with this, but it can be useful. For instance, if you want to find all the pictures you took on a particular day, it won’t help if your camera still thinks it’s 1987!
What’s Next?
This is a guide to camera settings for beginners, but it works just as well for professionals. I’m a professional wildlife photographer, and all my camera settings are the same! The only real limitations are the type of camera you have and your willingness to experiment.
You have to be brave to try new things, and I don’t expect everyone to put in place every one of these changes all in one go. However, escaping Auto mode and taking control of your camera settings should leave you free to do what you want! The more you understand how your camera works, the more you can set it up correctly and take better pictures!
Now you’ve got a handle on camera settings for beginners, we suggest you check our guides on photography and camera terms or the best camera brands next!

